How to Connect Your Amazon Account with SellerMate.ai
- Rushikesh Taralekar
- Jul 5, 2024
- 2 min read

Updated: Feb 3
This guide will walk you through the steps of creating an account and starting your free trial with SellerMate.ai, a tool for managing your Amazon Ads.
Step 1: Sign Up with SellerMate.ai
On the SellerMate.ai homepage, click on “Get Started” in the top left corner.

Follow the on-screen instructions to create your SellerMate.ai account. This involves entering your name, email address, and creating a password.
Alternatively, you can create an account with your Google account.

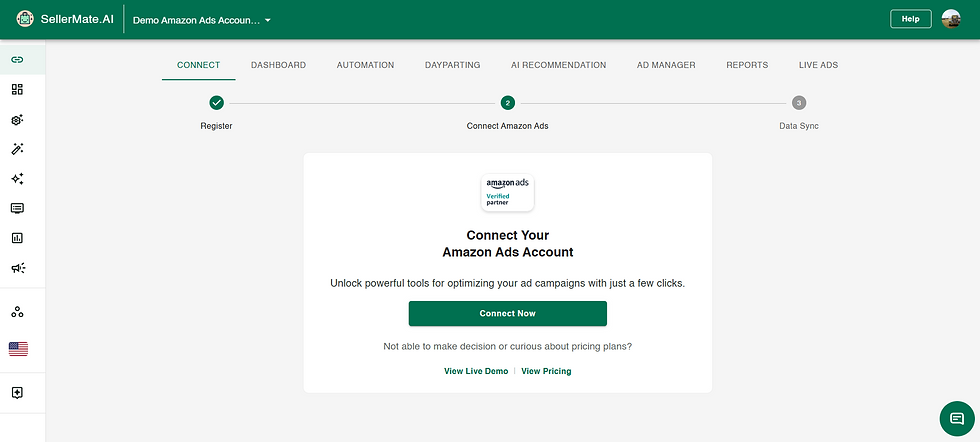
Step 2: Connect Your Amazon Ads Account
Once you've signed up and logged in to SellerMate.ai, you will enter the SellerMate.ai dashboard.
You should see a button or option to connect your Amazon Ads account labeled "Connect Amazon Ads."
Click on the "Connect Now" button.
Step 3: Authorize SellerMate.ai to Access Your Ads Data
Clicking the Connect now button will redirect you to the Amazon Seller Central login page.
Enter your Amazon Seller Central login credentials (email address and password) on this page.
Amazon will then ask you to review the permissions SellerMate.ai is requesting. These permissions allow SellerMate.ai to access your advertising data but not make any changes to your campaigns.
Please grant access to allow your Amazon advertising data to be added to SellerMate.ai.
P.S. We are Amazon’s trusted partner, and your data is completely safe with us. You can revoke access at any time.


Step 4: Return to SellerMate.ai
Once you've granted permissions, Amazon will redirect you back to the SellerMate.ai platform.
Your data sync will begin. Please allow a couple of hours for the data sync to complete.

Syncing you accounts will take few minutes to an hour depending on your data. In the mean time you can explore out features like automation rules & dayparting's. You can always track your syncing status on amazon accounts tab.

Congratulations! You've successfully connected your Amazon Ads account to SellerMate.ai. Now you can explore the SellerMate.ai platform and leverage its features to manage your Amazon advertising campaigns.

After connecting your ad accounts, you can also link your Seller Central and Vendor accounts. The process is straightforward and similar to connecting ad accounts.
Clicking the Seller Central button will take you to the Amazon Seller Central login page.
On this page, enter your Amazon Seller Central login details (email address and password).
Amazon will prompt you to review the permissions requested by SellerMate.ai. These permissions allow SellerMate.ai to access your Seller Central data without making any changes.
Grant access to have your Seller Central data added to SellerMate.ai.
You can also connect Vender account with similar process by clicking on "Vender Central" Button
Additional Notes:
SellerMate.ai typically offers a free trial period of 1 month. Be sure to check the website for current free trial details.
No credit card information is required to start the free trial.
You can cancel your subscription before the free trial ends to avoid any charges.


Comments